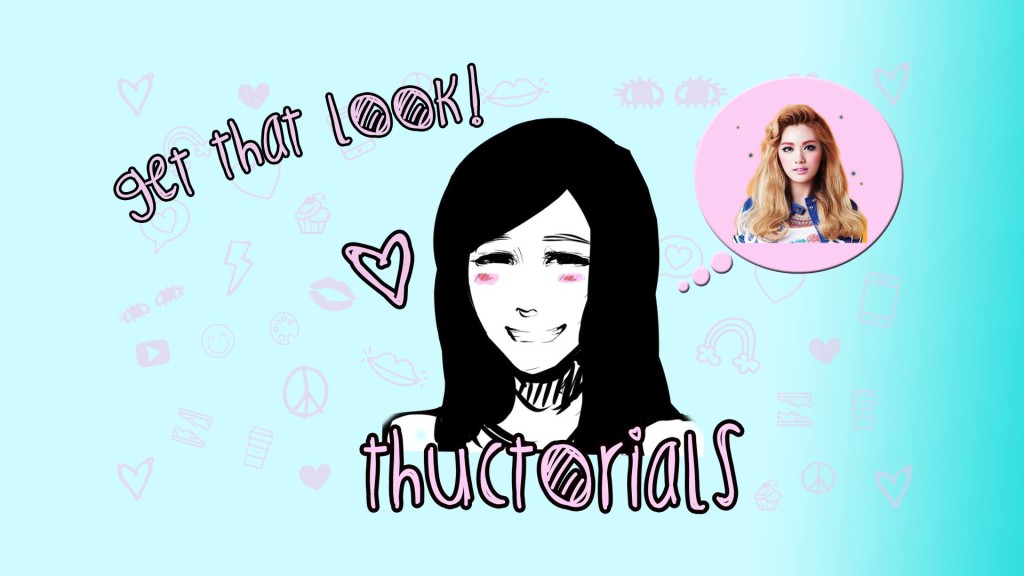
Thuctorials: Orange Caramel’s Nana “Lipstick” Makeup Tutorial
There’s no doubt that Orange Caramel is always fun and colorful, but have you ever wanted to try their makeup style for yourself? I will show you how to Get That Look of Nana during the group’s Lipstick promotions!
As part of our very own Thuctorials series, this article will give you the full details on the colors and products that I used to imitate Nana’s makeup. None of these are exclusive products and you can get most of them in your regular department stores or online (online is recommendable especially as you can apply discounts like https://www.raise.com/coupons/kohls when you shop). When it comes to the foundation you might want to adjust to match your base skin tone but the brand itself you might want to stick with.
At the end of the day this is about having fun, so getting too stuck in the details of this brand and that product shouldn’t be on the agenda. If you feel a different brand or shade matches Nana‘s look then go for it!
Check out our video to watch a step-by-step tutorial of this look:
Check out these cool articles around the web


Prefer a written tutorial? Read on!
Prep

Before I put on my primer, I always make sure my face is clean and free of any dirt or oil. That way, the primer can stick onto my skin rather than the gross stuff! I used Rimmel London’s Stay Matte Primer:

I use my fingers for application because I feel like it’s the best method of making sure the primer is even and blended throughout my face.

You don’t have to use primer, but I prefer to do so because it helps smooth out my skin and pores, plus it helps my makeup stay on for a longer period of time!

Foundation
If you have clear skin, and you want lighter coverage, you can lightly powder your face. However, I like to cover my scars and blemishes with a liquid and powder foundation combination. I first applied Revlon’s 24 Hour Colorstay in medium beige with my fingers (MAKE SURE YOUR FINGERS ARE CLEAN), but a beauty sponge or likewise would work better. I didn’t have any in my possession at the time:


Afterwards, I used bareMinerals’ MATTE Foundation Broad Spectrum SPF 15 in medium beige with the brand’s Precision Face buffing brush for application. The instructions that come with the loose powder recommend a circular application, so I followed suit. Blend everything towards your neck for a smoother gradient.


Brows
I don’t have orange brow gel, so I used my bhCosmetics BH Day & Night eyeshadow palette, an angled brush from a dollar store pack of brushes, and eyedrops:


The eyedrops help intensify the eyeshadows and bring out their color! To tame my brows, I used a spoolie that you can buy at dollar stores, and then I drew a rough draft of what I wanted my eyebrows to look like with this orange color:


Then I went over my brows with this darker, orange-brown color to make it stand out a bit more:

I groomed and set the eyeshadow with my wet n wild’s megaclear Brow & Lash Mascara.


Eyeshadow
Instead of eyeshadow primer, I use my wet n wild’s idol eyes crème shadow pencil in Pixie as a base, covering my eyelid area:


I followed this up with NYX’s Jumbo Eye Pencil in Strawberry Milk for my waterline, making my eyes appear larger. Try not to tug on your eyes too much, because it could stress them out!


For the eyeshadow, I used an eyeshadow brush, which came from the same dollar store pack as my angled brush, with the Day & Night palette. I went with this purple color first:

Covering up my eyelid area, I extended the shadow while following my crease and pulled the color under my eyes to connect the lines. You can do a little wing shape if you’d like!


After the purple, I chose a darker navy blue:

I covered the same area as the purple, as well as extending the blue past my inner tearduct.


To prep for my eyeliner, I used my angled brush and black eyeshadow:

If you haven’t noticed already, I like to layer my makeup! It adds more color, and I’ve found that it blends out really well. I made a guideline for my eyeliner with the black eyeshadow, following my lash line and extending it out on both sides.

Eyeliner
I’m a fan of marker-type liquid eyeliners, so L’Oréal’s THE infallible BLACKBUSTER 8 HR liquid eyeliner works great for me. Choose an eyeliner that you like and are most comfortable with using.

I basically followed the eyeshadow guideline:


Mascara
Nana may be using fake lashes, but my personal pair of lashes don’t match the dolly, fluffy ones that she sports. As a result, I forgoed the lashes and just went with mascara. I generally do multiple mascara products to make my lashes as long as possible, because I am just a sucker for long lashes. I started off with my clear mascara as a base and to separate my lashes:

I then went over it with one coat of my jordana’s BESTlength EXTREME Lengthening Mascara. I apply my mascara at this angle because it helps me not get any residue on my eyelids! Blinking while applying the mascara also helps me get the most product onto my lashes.


For volume and added length, I used my little sample of MAC’s ZOOM Fast Black Lash and applied it in the same manner.

As you can see, I like to put mascara on both my upper and lower lashes. If you’re not into that, you don’t have to do it!

Lips
For the base, I used wet n wild’s megaslicks lip balm in Rico Mauve, covering the shape of my lips.


To imitate Nana’s bright pink lips in the reference photo I used, I decided to go with my homemade carnation pink lipstick and a lip brush from the aforementioned brush pack.

It looks a little funky because it melts in hotter temperatures, but it works fine, don’t worry! I warmed up this lipstick using my breath for two reasons: (1) it was in an air-conditioned room for the majority of the tutorial, and (2) it helps make the lipstick workable. I applied it on the same area as the lip balm.

To make sure none of the lipstick got on my teeth, I sucked on my thumb for a little bit and pulled it out, wiping the extra residue. Do a final check on your own teeth and wipe any stains that you see before you go out!

Outfit
I don’t really have a stylish wardrobe like Nana’s, but you could pair a bright, fun dress or layered look with this! Here’s what Nana chose to wear:


Patterns with analogous or split complementary colors work very well with her makeup, and I’m positive they will work well for you if you choose to try this look out!
Hair
For hair, I personally would have liked to curl my bangs and do a curly-wavy hybrid of a ponytail; however, I needed to do more yardwork and consequently shower, so I felt no need to do my hair. Here are some hairstyles you could try:

That’s it for this Thuctorial! If you’d like me to do more of these, feel free to make a request on any of our social media sites or just comment below. I will also be doing Korean beauty product reviews, so request any products that you’d like a second opinion on!
[DISCLAIMER: All products are mine, bought with my own money. This tutorial was not sponsored]
Which idol would you like to be the focus of the next Thuctorial? Which Korean beauty products are you interested in? Share your thoughts with us, and make sure to follow us on Facebook, Twitter, Instagram, Tumblr, and Bloglovin’ so you can keep up with all our posts.